UVC Video Streaming (RTSP)
Table of contents
- Overview
- Requirements
- Setup Hardware
- Network Configuration
- Run Software on Target
- Viewing Stream
- Recommended UVC Cameras
Overview
This user guide provides the necessary steps to get video streaming over RTSP network using a UVC (e.g. USB webcam like a Logitech C270) and the VOXL system.
In short, we’ll be doing the following:
- Connect an HD USB webcam to the VOXL’s USB Hub
- Use
ffmpegon the VOXL to stream the video to the host computer - Use either VLC or QGC on a host computer to view the video stream
Requirements
Hardware
| Part Number | Description | Link |
|---|---|---|
| Host Computer | Ground Control Station (Ubuntu 18.04) | |
| VOXL-DK | VOXL Development Kit | Purchase |
| MPS-00001-1 | 5V/6A Power Supply | Purchase |
| MCBL-00009-1 | USB Cable (Host, 4-pin JST to USB 2.0 Type A Female) | Purchase |
| Camera USB Cable | USB Cable included with camera (Mini USB) |
One of the following VOXL Add-on boards is required.
| Part Number | Description | Link |
|---|---|---|
| MDK-M0048-1-01 | VOXL Microhard Modem Add-on | Purchase |
| MDK-M0017-1-01 | VOXL USB Expansion Board with Fastboot and Emergency Boot | Purchase |
| MDK-M0030-1-01 | VOXL Cellular LTE and USB hub add-on | Purchase |
Target Software
TODO check isn’t this part of the base system image now??
ffmpeg is no longer included as part of the VOXL-Suite, a stand alone IPK can be found here.
Host Software
- On the host computer, install VLC media player, which we’ll used to display the RTSP video:
sudo apt-get install vlc
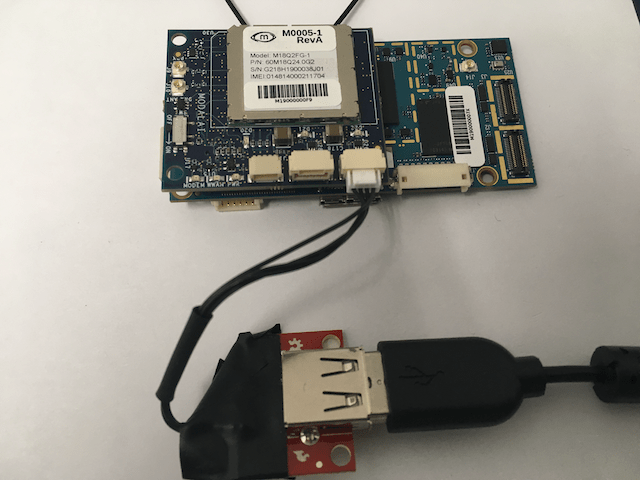
Setup Hardware
- Disconnect power from the VOXL
- Attach the USB Hub accessory to VOXL J13
- Attach the JST cable to the JST USB connector (J16 or J17)
- Attach the Logitech C270 (or equivalent) UVC camera to the USB connector on the JST to USB Female A cable
- Connect power to the VOXL
Network Configuration
- Configure the VOXL as an Access Point (or connect it to a network)
- instructions on how to do this are here
- the default IP address of the device will be
192.168.8.1
- Connect the host computer to the VOXL’s Access Point (default password is 1234567890) or to the same network you connected the VOXL to
Run Software on Target
Starting FFmpeg
- SSH onto the target (see here for details) or ADB in using a micro-usb to USB cable
- First, validate the the USB device is found using the
lsusbcommand:
root@apq8096:~# lsusb
Bus 001 Device 003: ID 046d:0825 Logitech, Inc. Webcam C270
Bus 002 Device 001: ID 1d6b:0003 Linux Foundation 3.0 root hub
Bus 001 Device 002: ID 0424:2514 Standard Microsystems Corp. USB 2.0 Hub
Bus 001 Device 001: ID 1d6b:0002 Linux Foundation 2.0 root hub
- Start ffmpeg with the following default command
ffmpeg -i /dev/video2 -f mpegts udp://QCS_IP:4242
Replace GCS_IP with the IP address of your host computer acting as the Ground Control Station.
FFmpeg has a large variety of flags that can be set in order to change the encoder settings and modify the resolution, framerate, bitrate, etc. of the video stream. The documentation can be found on the FFmpeg website.
Viewing Stream
VLC
On the host system, run the VLC software
Go to
Media > Open Network StreamEnter the following URL:
udp://@:4242Click
Playto view the video stream
QGroundControl
Before attempting to view the video stream, follow these instructions on connecting to QGC: How to Connect QGroundControl to VOXL using WiFi
After your connection has been established to QGC, press the purple QGC logo in the top left corner in order to access the
Application Settingsmenu.Under the
Generaltab, scroll down until you find theVideosection.Under the
Video Sourcedropdown, chooseMPEG-TS (h.264) Video Stream.In the
UDP Portfield enter the default:4242You will now be able to view the video stream under QGC’s
Flyview.
Recommended UVC Cameras
The Arducam is the recommended UVC camera for the m500. There are many different Arducams to choose from depending on your requirements. You can find the Arducam Specs and Selection guide by going here.
The Arducam B0229 is an excellent choice:
- Field of View (FOV)D=105°, H= 90°, V= 65°
- Supports MJPG 15fps@ 3264x2448, 30fps@1080P, and YUY2 30fps@ 640x480 formats.
How to mount Arducam on the m500 Gimbal