Sentinel Pre-Flight Setup
Using QGroundControl for QGC
We will be using QGroundControl as a means to perform the pre-flight setups and checks as needed.
Sensor Calibration
Sentinel flight sensors are delivered pre-calibrated from the factory. PX4 will warn you if your compass needs to be re-calibrated depending on your location and environmental conditions. If so, or if you’d like re-calibrate all sensors, follow the px4 sensor calibration procedure.
RC Radio Setup
Bind Receiver to Transmitter
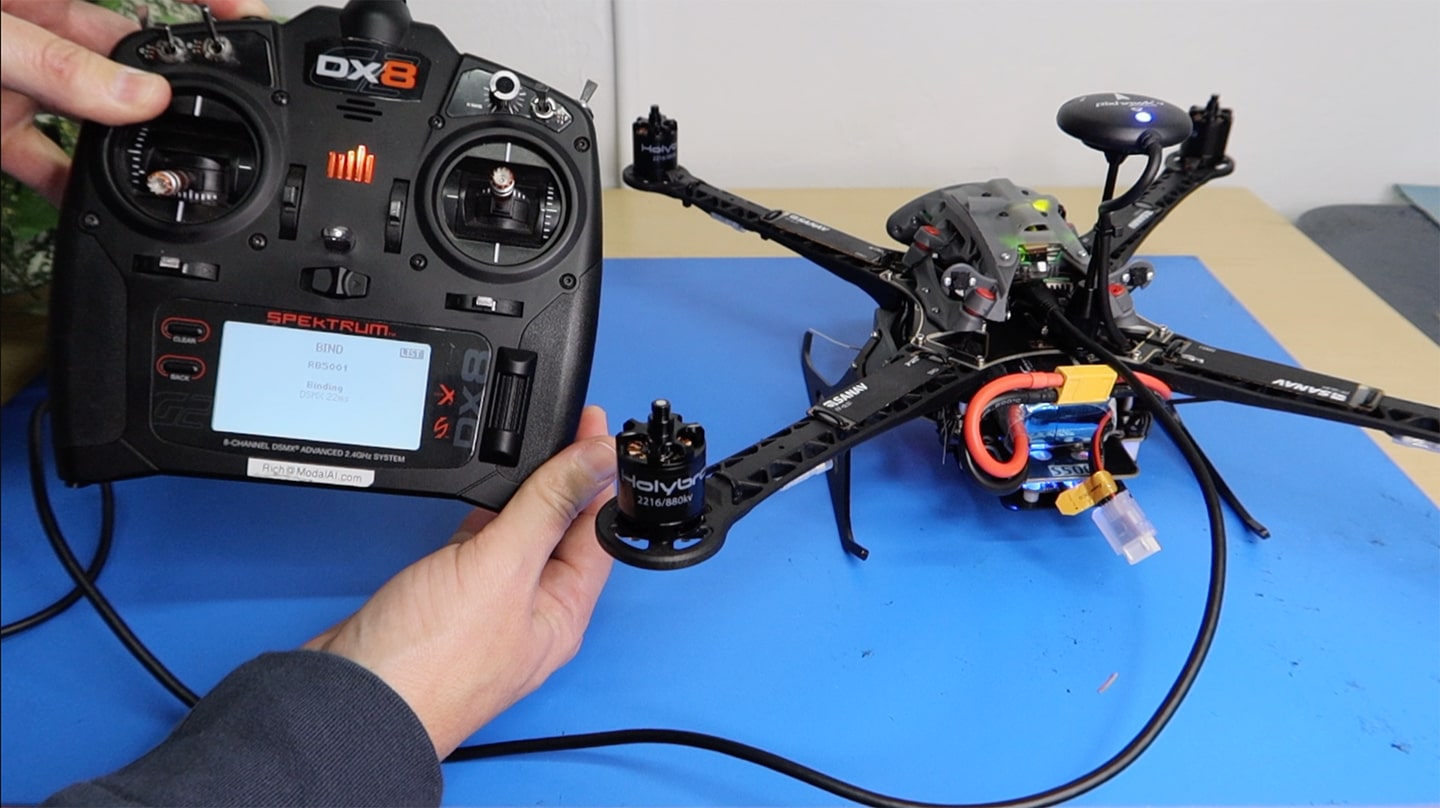
Sentinel has a Spektrum receiver that must be paired (or “bound”) with a transmitter. Follow these instructions to pair your Spektrum transmitter to Sentinel.
First, make sure your Sentinel is powered on.
Next, connect via ADB by plugging the USB-C into Sentinel’s flight deck. Then, open up the terminal and type:
adb shell
To use the binding utility, use
qrb5165-bind
Follow the on-screen prompts. Select your bind type.
Tool used for binding Spektrum receiver. In order to use, select ONLY 1 bind type.
-d, --debug       enable debug messages
-h, --help        print this help messag
-t, --DSM2_22     3 pulses (DSM2 1024/22ms)
-f, --DSM2_11     5 pulses (DSM2 2048/11ms)
-s, --DSMX_22     7 pulses (DSMX 22ms)
Once you select your type, you will see the message:
An orange light should now be flashing on your receiver.
If so, your receiver is successfully in binding mode
Check that the receiver is in binding mode. The light should flash.

Once in binding mode, pair your transmitter to the receiver. The exact instructions for pairing depend on your transmitter. Check with your transmitter’s manufacturer for up to date information.
Once the transmitter is paired, make sure the receiver light is solid orange.
Make sure to power cycle your Sentinel before continuing
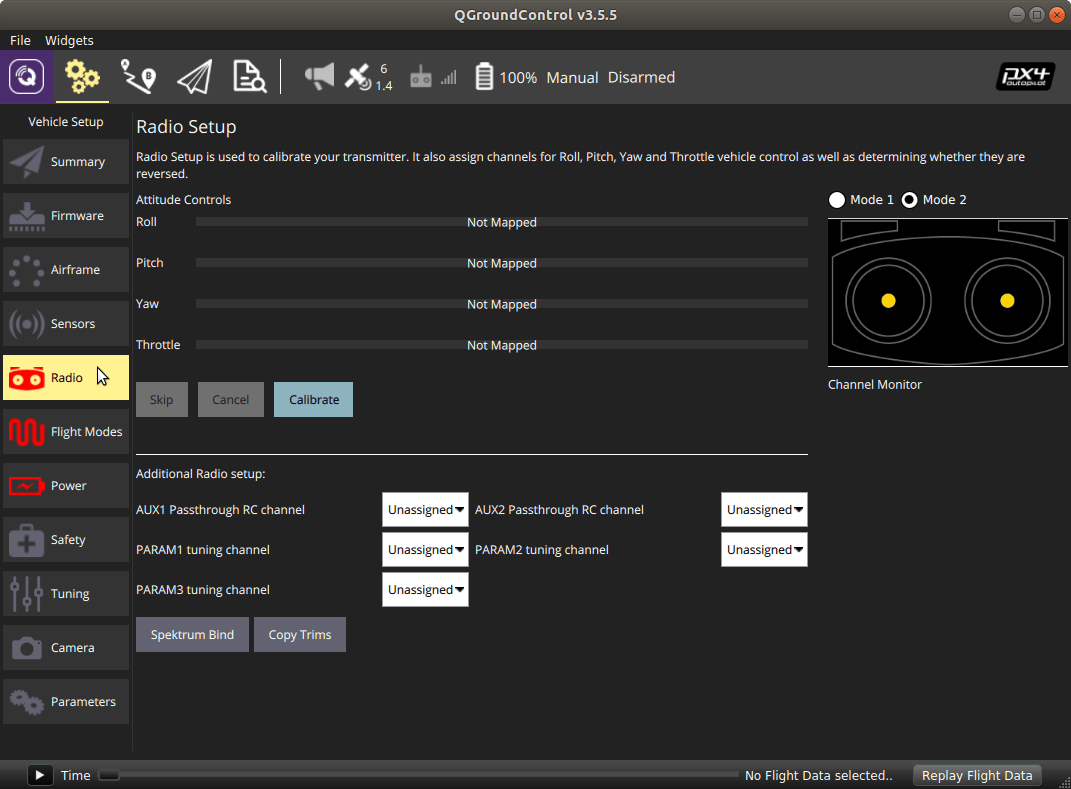
Calibrate Radio
Once bound, power cycle the vehicle and restart QGroundControl, otherwise the radio channels will fail to show up. Now follow the on-screen instructions to calibrate the range and trims of your radio.
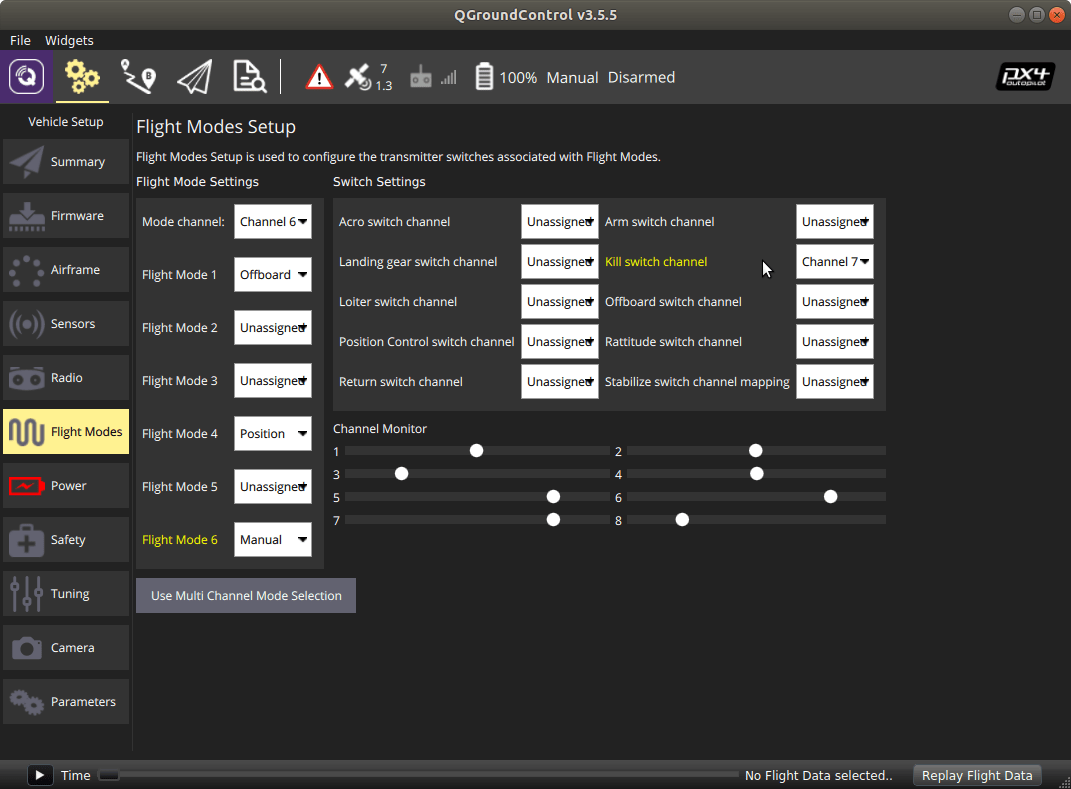
Confirm RC Settings
Every user will want to use different flight modes and different switch assignments, but for getting started with Sentinel we suggest starting with something similar to this configuration and working from there.
- “Flap Gyro” switch left of Spektrum Logo
- Channel 6
- Up position: Manual Flight Mode
- Middle Position: Position Flight Mode
- Down Position: Offboard Flight mode
- Channel 6
- “Aux2 Gov” switch right of Spektrum Logo
- Channel 7
- Up position: Motor Kill Switch Engaged
- Down Position: Motor Kill Switch Disengaged (required to fly)
- Channel 7
Since we have a manual kill switch on the radio there is no need for the “safety switch” on the Pixhawk GPS module as so it is disabled in our params file in favor of the kill switch.
If you have a Spektrum DX6e or DX8 radio with a clean acro-mode model you can accomplish the above channel mapping by loading the following config file
https://gitlab.com/voxl-public/px4-parameters/-/blob/master/params/spektrum_dx8_config.params
Still confirm the mapping in QGroundControl before flight!